

 A geotag is an invisible stamp on a photo that details the exact location of where it was taken. This information is a rarely tapped resource by staff and students yet it’s likely that most students will already be geotagging their photos, even if they’re not aware of it. If they, or you, use a mobile device which has a camera and a GPS receiver (think most smartphones) then it’s likely that any photo you’ve previously taken, using that device, already has a geotag attached to it. If you don’t have such a device, don’t worry, it’s a relatively simple process to retrospectively add this useful information. As for the benefit and purpose of wanting to extract this geotag data, read on for some ideas on how to embed its usage into lessons for teachers or research for students.
Imagine you are just about to embark on on a Biology, Art, Geography field trip (any type of trip will do!) with a group of students. Let’s assume that you’ve organised a walk along one section of the London Loop collecting data, samples, images, readings etc. for use in class when back in school. Students could take photos along the route not only as a personal reminder of the fun they had but also to record the location of where each piece of data was collected. By collating all of the geotagged photos into a central folder it’s possible to build up a map of where they were taken potentially offering further evidence or information on where the data was collected. Have a look at this map as an example: London Loop (Enfield Lock to Chigwell). You’ll see that the photos I have taken are embedded into the familiar landscape of Google Maps with each image being embedded into the map at the exact location the photo was taken. I’ve also added some brief captions to clarify the view or add a reflection on what has been photographed. Here’s the process that I took to create the map:
| 1. I uploaded my photos, into a single folder, to a Picasa or Google+ account. | 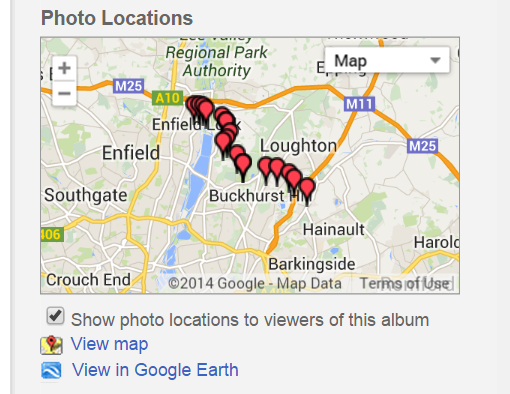 |
| 2. View the folder via Picasa Web Albums | |
| 3. Click the ‘View map’ underneath the map in the bottom right hand corner (see image opposite) | |
| 4. Change the security settings to ‘Limited’. This will allow anyone with the web address to view the map. If you don’t make this change only you, as the owner of the Picasa or Google+ account, will be able to view the map and pictures. | |
| 5. Send the URL (the web address) of that page to other users so that they can see your geotagged map |
Retrospectively adding Geotag data As I mentioned above it’s possible to add geotag data on photos that have not been geotagged. Any such photos need to be uploaded to the Picasa/Google+ folder and when viewing the map click on Edit Map in the top left hand corner. This will allow you to drag and drop the photos onto their correct location on the map.
Be careful when collating the images If you’ve got a group of students taking photos don’t get them to email you the photos – this can often strip the photos of its vital geotag information. Instead get them to upload the photos to a central file, export them to a removable drive or, better still, give them upload access to your Picasa or Google+ account. iPhones are particularly notorious at not retaining their geotag data when emailed. Play safe and avoid emailing the photos wherever possible.
Other Ideas for using Geotagged Photos
- A ‘live’ map of a school residential trip. Photos could be uploaded at the end of each day to create an ever-expanding map of destinations and locations. This could be accessed and enjoyed by parents, friends, relatives and staff.
- Students could collaborate on a class-wide project examining the extent of, for example, Acute Oak Decline. Students could find and photograph affected trees near them over a set period of time. Alternatively, local trees not affected could be photographed and plotted on a map to find any correlations in the spread of the disease.
- A geography field trip could follow the course of a river. Geotagged photographic evidence would help record the different features and sections of the river.
- DofE Students could track-their-trek when on an expedition.
- A geotagged map could be a marketing opportunity for your school or a department. A music department could, for example, keep a record of all the venues that their orchestra(s)/choir(s)/ensemble(s) have played in.
Security Do remember that once the web address for a map is available for others to view this can be easily passed from person to person. Make sure that you follow any school policy or guidelines on the public display of images of your pupils or staff. If in doubt, only publish photos of images where faces have been blurred or not in the photo at all.
Geotagging isn’t perfect I’ve found that for, roughly, every 50 photos taken there is approximately one photo that has the wrong geotag data embedded into it. A good example is from a recent walk I took along another section of the London Loop. When I uploaded my photos I found that one had been geotagged to the very centre of the King George V Reservoir! Therefore, do be prepared to manually change some of the geotag data to account for these occasional errors.
Share your thoughts If you’ve used geotagged photos in your lessons or you have good examples for others to see, why not share them here. Click on ‘join the discussion’ below.
 Currently the Head of e‑Learning and a teacher of Music and Computing at a large school in

[…] couldn’t do without: the phone/text calling facility, the camera and my rather nerdy need for geotagging with GPS. In short, I don’t really need a fancy smartphone with apps. Do you? Do students? I’m […]